Showing posts with label Butterflies. Show all posts

Monday, February 28, 2022

Kitchen Sink Stamps - Butterfly Birthday

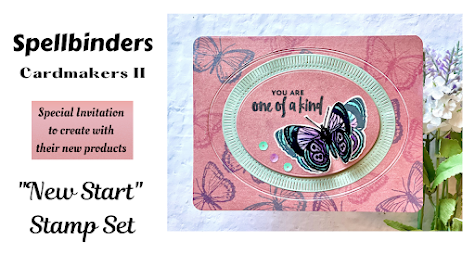
 Hello! Today I have a mini-slimline card that I made to help promote the Mod Squad Challenge Blog which has been sponsored by Kitchen Sink Stamps. The Mod Squad Challenge page can be found here: https://modsquadchallenge.com/birthday-butterflies/

The deadline to enter the current challenged is 12 p.m. EST on 2/28/2022  The Mod Squad Challenge is a card challenge. The designer selects a theme, creates a card for the theme, and then card markers entire their cards.  There is a $25 gift card for Kitchen Sink Stamps given to one random winner. There are also three top cards selected by the designer (no prize, but bragging rights!).


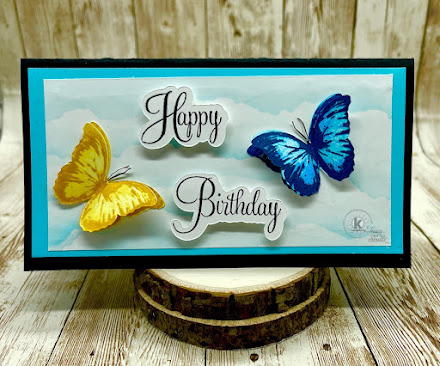
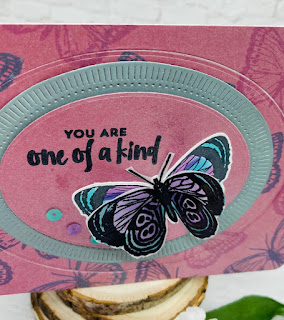
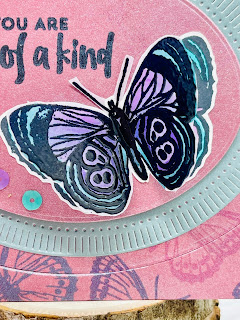
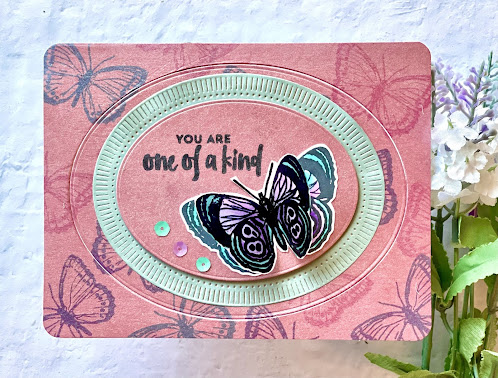
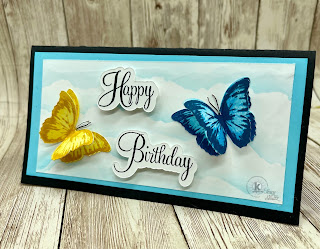
To create my mini-slimline card I used the Butterflies stamp set from Kitchen Sink Stamps and my sentiment came from the Words 4 Celebrating Stamp Set. I also used the Cloudy Skies Stencil from Kitchen Sink Stamps. 
Order here: Kitchen Sink Stamps:

These are the steps I took to create the card:
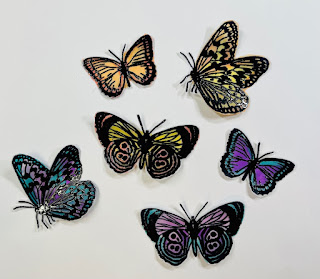
1. Using the free SVG cut files available from Kitchen Sink Stamps, I stamped the smaller open winged butterfly SVG (with and without antenna) using the following Catherine Pooler Ink (Starting with Layer 1):
  • Layer 1: Oh Boy!
  • Layer 2: Something Borrowed
  • Layer 3: Juniper Mist (Stamped off 1 time)
I repeated these steps with the following Catherine Pooler Ink  (starting with Layer 1):
  • Layer 1: Chiffon
  • Layer 2: Limoncello
  • Layer 3: Tiara
2.  From the Words 4 Celebrating stamps set, I used to SVG files and stamped Happy Birthday with Versafine Clair Nocturne Ink. 
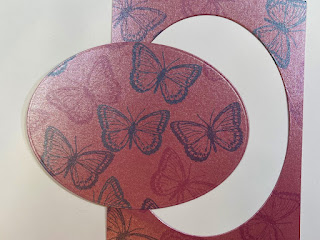
3. Using the Cloudy Skies Stencil and Catherine Pooler Oh Boy ink, I ink blended clouds for the background panel (size: 2.75" wide x 5.75" tall). 
4. Using Oh Boy Ink from Catherine Pooler, I swiped my ink pad directly to another piece of paper to create a mat layer (3" wide x 6" tall) 
5. Using black card stock I created a black card base (size 3.25 wide x 6.25" tall) and adhered both the Mat Panel and the cloud back ground panel. 
6. Using foam tape I adhered the sentiment to the cloud layer.
7.  I adhered the butterflies without antenna flat to the cloud panel. I adhered the butterflies with antenna with a thin line of glue along the body of the butterfly and lined them with the flat butterflies. 
Thank you for visiting my Blog - have a hopeful day!


Order here Catherine Pooler Ink: Catherine Pooler Ink:https://shop.catherinepooler.com/?aff=111

My Social Media:
You Tube: https://www.youtube.com/c/TracyShultz Blog: www.thehopefulcrafter.com Instagram: @Shultz551 Pinterest: https://www.pinterest.com/shultz551/ Facebook: https://www.facebook.com/thehopefulcrafter.com Email: thehopefulcrafter@gmail.com


Saturday, December 11, 2021

Spellbinders Guest Creator - New Start Stamp set


Hello! Today I am sharing a card that I made with the "New Start" stamp set from @teamspellbinders Spellbinders. I was asked in October by Yana Smakula if Spellbinders could send me some products to feature on my social media. It was such an honor to be asked, and of course I said yes! Spellbinders sent me two stamps sets. Today I feature the beautiful "New Start" Stamp Set:https://shrsl.com/3arnd 
#Spellbinders #neverstopmaking
I created a video on my YouTube channel that you can watch for more details:  

I first created a background panel by stamping a piece of pearlescent card stock with the small butterfly stamp in three colors of Versafine Clair Ink: Charming Pink, Warm Breeze and Fantasia. I set that aside to dry. 


Next I stamped the butterflies using Momento Tuxedo Black Ink. I used Hammermill Premium Color Copy Cover Paper. I used copic markers to color the butterlies. I colored some of them with purple and auqa/teal markers and others I colored with orange and yellow markers. 


I also stamped and embossed on vellum. To do this, I stamped using Versamark Ink and I embossed with Black Embossing powder. Then I colored with Copic Markers (always color on the back of the vellum). I used my Scan N Cut to cut out the paper butterflies and I fussy cut the vellum butterflies. 


I then used the Fluted Classic Ovals dies from Spellbinders to finish my card:


Here's a photo of my finished card:

Thank  you for visiting my blog today. 

List of Products Used:
Spellbinders: https://shrsl.com/2pq20 New Start Clear Stamp Set from Cardmaker II Stamp Collection: https://shrsl.com/3arnd Fluted Classic Ovals Dies: https://shrsl.com/3arwo Pink Pearlescent Cardstock: https://shrsl.com/3aryn Charming Pink Versafine Clair Ink: https://shrsl.com/3arx0 Warm Breeze Versafine Clair Ink: https://shrsl.com/3arx3 Fantasia Versafine Clair Ink: https://shrsl.com/3arx4 Vellum: https://shrsl.com/3aryp Copic Markers: Blick - https://shrsl.com/2qd5x Marvy Uchida - Jewel Picker - Double Ended: https://shrsl.com/39k8u Bearly Art - Precision Craft Glue - The Original: https://shrsl.com/39k8w Hammermill Cardstock, Premium Color Copy, 80 lb, 8.5 x 11: https://www.amazon.com/dp/B000J0C47S?ref=exp_nancystamps_dp_vv_d Hero Arts Ultra Clean: https://shrsl.com/38ybb Altenew - Cutting Mat (SBC): https://shrsl.com/38ox0 Altenew-Cutting Mat (AN): https://shrsl.com/38oxu Wondershare Filmora (Video Editing Software): https://shrsl.com/2yrp6 Canva Designs for Social Media Posts: https://www.canva.com/join/wonderful-cheer-press
Thank you, Yana Smakula, for asking me to create with this stamp set:
My Social Media: You Tube: https://www.youtube.com/c/TracyShultz Blog: www.thehopefulcrafter.com Instagram: @Shultz551 Pinterest: https://www.pinterest.com/shultz551/ Facebook: https://www.facebook.com/thehopefulcrafter.com Email: thehopefulcrafter@gmail.com

Spellbinders Guest Creator

Blue Knight Silhouette Grasses, Pan Pastels & Ink Blending.